Sunday, March 27, 2016

Battle of Ragogna Part 2

Battle of Ragogna Part 2
German Attack on the Main line


The forces
The easy victory over the outer defenses  gave the German Lt. a boost of confidence(+1 force moral) as he prepared for the attack on the main line. The Italians had withdrew in good order, the Commanding officer of the regiment was content with events so far and the LT and men were confident in the defenses of the main line.


The Germans were down 3 men from last time all being taken from the Mg sections.

They were supported by:
an off table mortar
a sniper team
a Maxium 08 mmg
Pre game Gas
one assault bomber section had two trench brooms
an extra lewis gun was added to a MG section
and a Flamethrower 


The Italians, 5 men down had to remove and man from each squad with the 3rd rifle squad losing 2 men.  

They were supported by:
the SOS barrage 
an MMG
off table mortar
and 4 sections of barbed wire

The Game
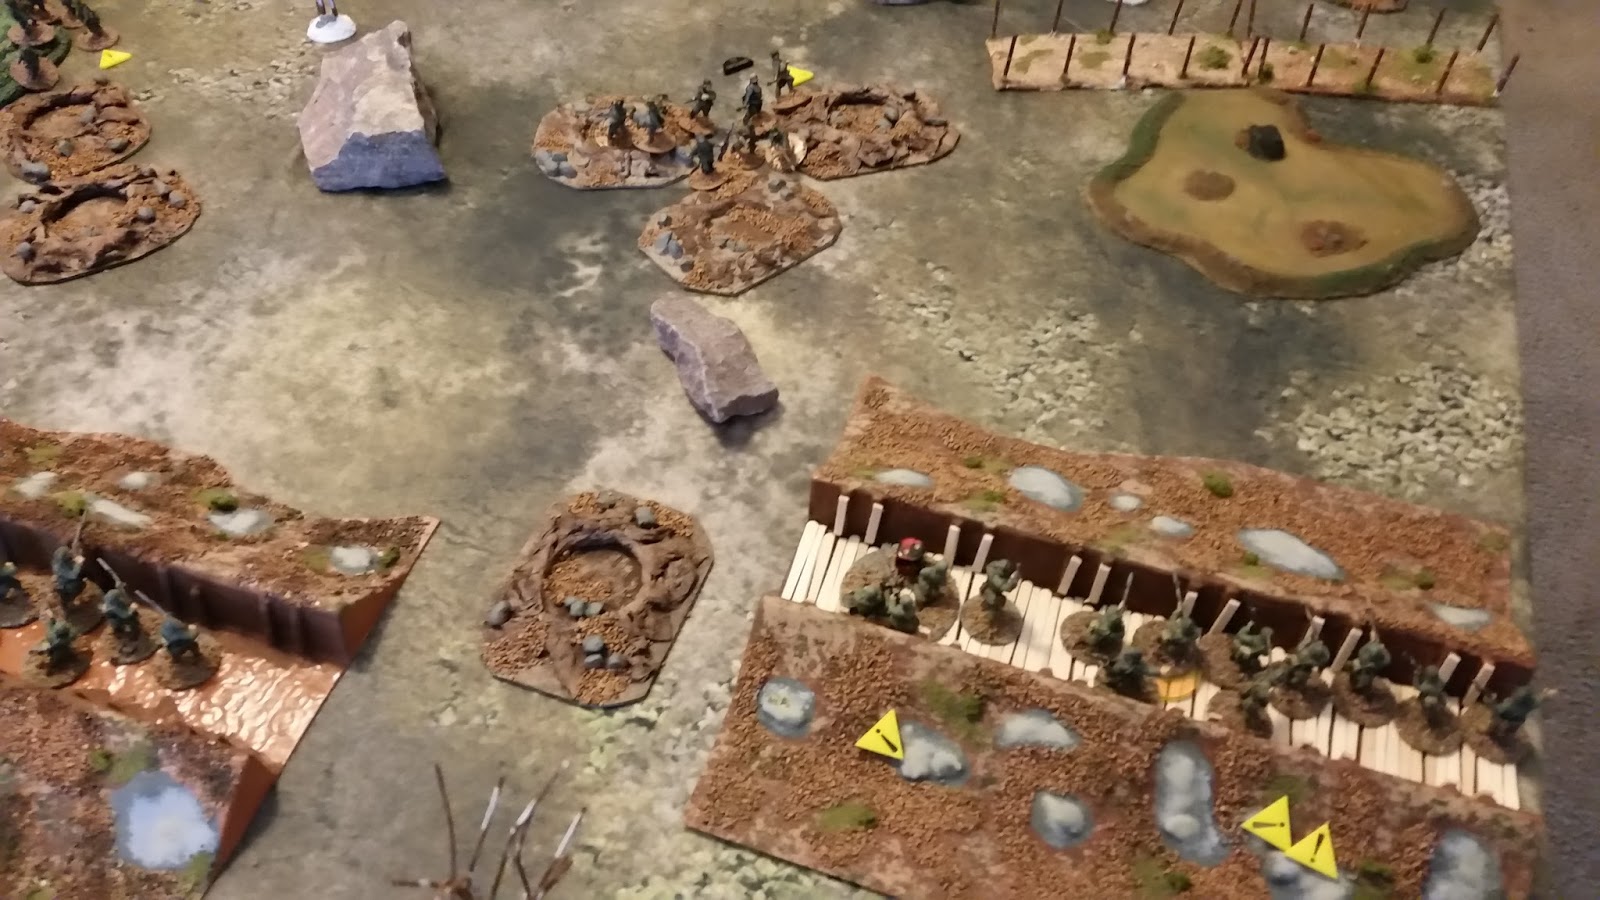
Again we are using Two Fat lardies WW1 chain of Command rules. The table was set up for scenario 3 out of the WW1 CoC article.  Attack and defend with a main trench line running across the table and I placed my barbed wire to try and funnel the German attack. The force moral for the Germans is 11 and Italians is 8.  The men weren't as confident as I thought.


After the Patrol phase the Germans look like they are falling into my trap.  I also placed my SOS barrage markers (the small black circles on the table).  The SOS barrage is a barrage that can be called in on a preplanned spot.  The game mechanic is pretty fun you place upside down makers on the table 2 of which are the actual spots and a number of "fake" markers. I did 4 extras to try to throw her off.


The Germans start the game and immediatly roll 6,6,3,2,1,1. knowing that she will havc the next phase as well Kati quickly deploys her Mg sections, her sniper team and MMG to prepare the way for the bombers.


Luckily for me her next role wasn't so hot.  6,5,5,2,1,1.  She combines the two 1s and simply moves her MGs into better positions.


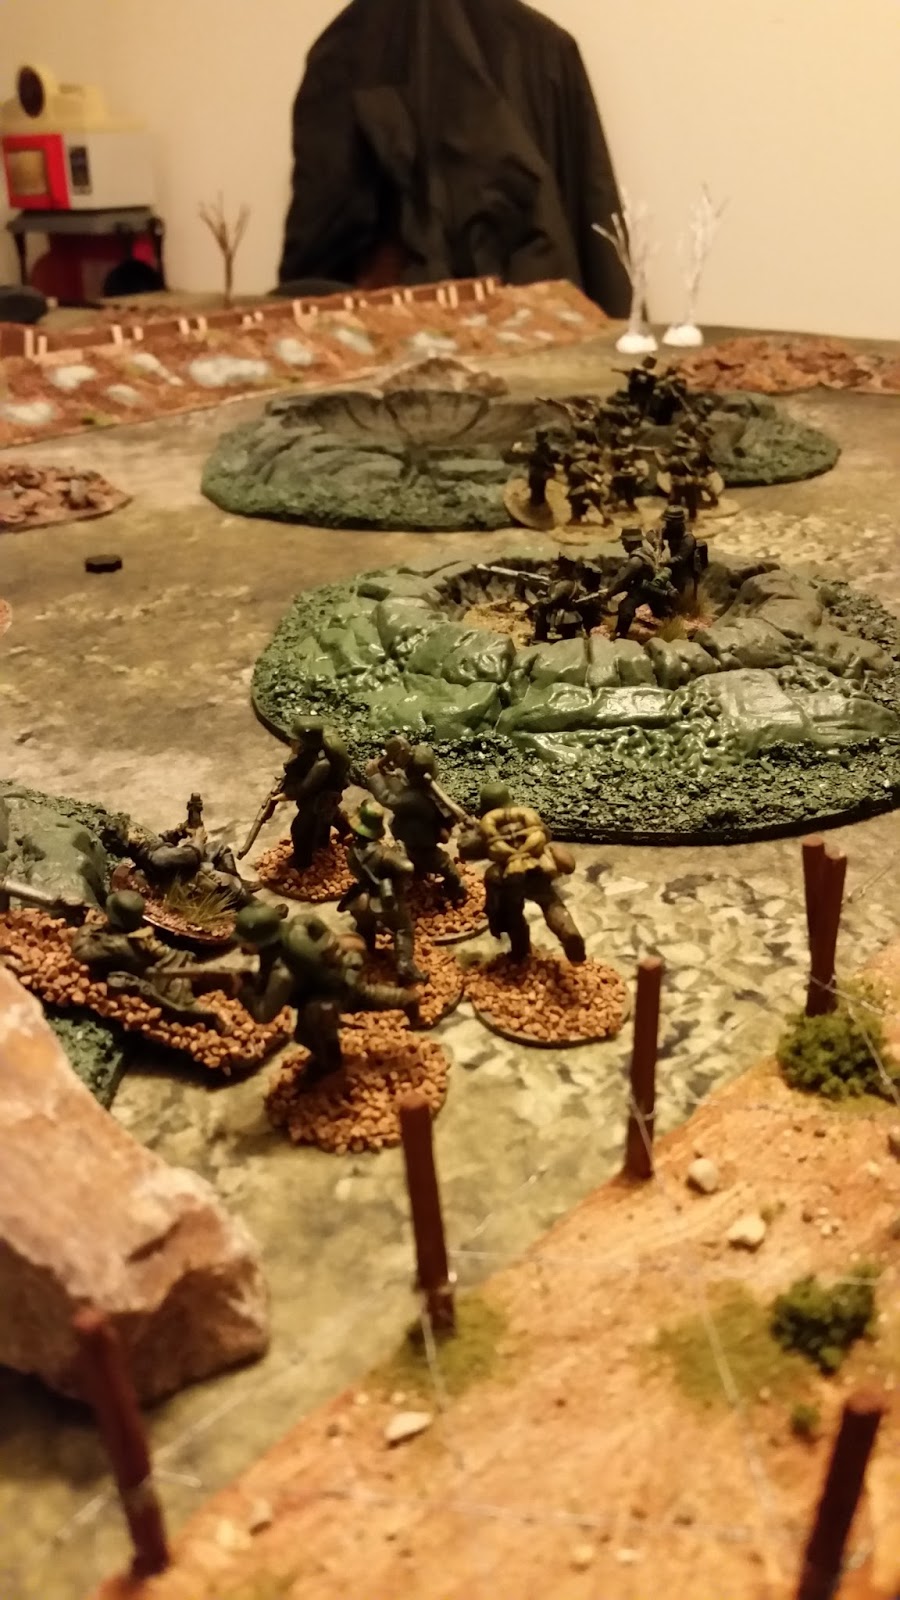
On my first phase of the game I roll 5,4,3,1(only 4 dice because of gas) I deploy my MMG and my Villar Perosa squad.  the squad opens with its Grenades and rifles(VP isn't in range) up on her over-confident MG section in the crater in front of them.  Thanks mostly to the grenades, the take out 4 guys. My Lt. arrives and has my MMG fire and they have no effect.


The Germans don't hold back and in the next phase thanks to a great roll of 5,4,4,3,2,1, she deploys both bomber section, a flamethrower and her LT and Sergeant.  Her Sergeant tries to have the MMG open up but it misses and jams on them.

My phase is pretty lame as I roll 6,5,4,4 all I can do is use my Lt. the radio the back lines...preparing the SOS barrage.


Rolling two 6s again Kati prepares for a good set of phases.  To her disappointment both bomber squads barely move leaving them more exposed than she wants as her off table mortar fires with little effect.  


Her second phase sees her men moving and throwing grenades into my line beating up both my VP squad and my MMG.  Her sniper also picks off a crew member of the MMG.


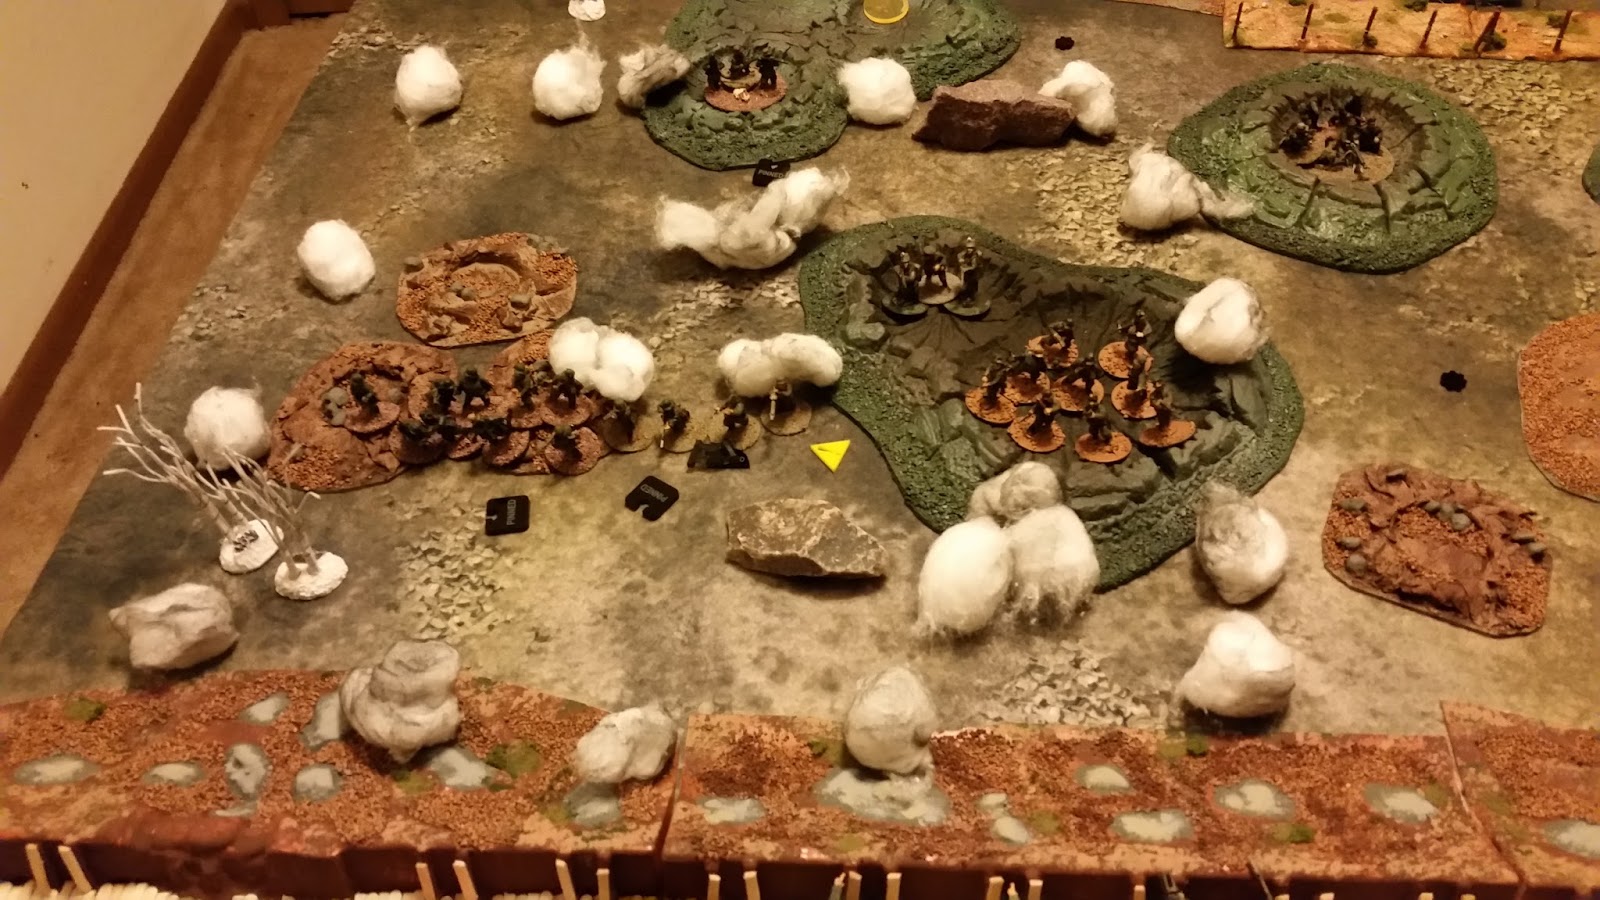
Luckily for me, I roll a 1 in my phase and spring my SOS barrage and it works perfectly, pinning down most of her force. I use the time to bring up more troops.


Kati has an extremely uneventful phase with only one thing worth noting she rolls a 5, giving her 5 chain of command points so she only needs one more 5 to end the turn on me...


I call in the barrage again and bring more men into the trench. My rifles whittle away her lone MG section....things are looking up for my men.

The next phase sees Kati roll the 5 she needs.  Her MG section fires and does score a kill and she ends the turn.


But as good as this was for the Germans, I immediately roll three 6s  and use the two phases in a row to wipe out the MG section that was caught in the open during the barrage (already missing in above pic) thanks to a wounding of the NCO then the Killing of him followed by the wiping of the section The germans moral stinks to a 9 from its starting 11!


My excitement is short lived though.. Kati follows up m phase with a pair of 6s and her bombers get to work. They wipe out my VP squad wounding my Lt. in the process..my moral drops to a 5.


the next phase sees two more 6s rolled and my rifle squad and MMG are looking for a reason to run....


The phase leaves them pinned and ready to break after the grenades do their work.


The phase spells doom for my platoon, I lose the MMG, then my rifle platoon and finally wounded and alone the Lt. falls.


That runs my moral down to a 0 ending a game just a few turns before I thought was going my way...curse the elite storm troopers and their 6 command dice.  

Aftermath
The Germans took 11 casualties taking the trench and the Italians lost 22 men including 2 NCOs and their Lt.  

My Lt., may he rest in peace, would probably have been looking for a new command after that disaster.

I moved a sergeant from another platoon into his new role as Lt. I will be calling up reinforcements (which you can only do once during the campaign).

With the taking of the main line the fighting is about to enter the poor village of San Petro. 


Battle of Ragogna Coc WW1 Campaign

Battle of Ragogna Campaign
Part one


A brief Intro
The Battle of Ragogna was a heroic stand by the Italian army during the the much larger battle of Caporetto which took place place from October 24th to the 19th of November. The battle of Caporetto is an amazing and interesting battle. Like most battles on the Italian front it took place among mountains and trenches craved out of solid rock. In brief the Germans helped the Austrians by launching a joint attack in late 1917 using well trained units and the most advanced assault tactics of the time. The attack was extremely successful, the Italian 2nd army cease to be a fighting force and the German and Austrians pushed back the Italians over 60 miles to the river Piave. Causalities where high on both sides: 70,000 german/Austrian dead or wounded and with Italy suffering 10,000 dead 30,000 wounded and more than 250,000 captured. There are many excellent books on the subject including “Rommel & Caporetto” by John and Eileen Wilks and “Caporetto and the Isonzo Campaign” by John Macdonald and Zeljiko Cimprie.

The Battle of Ragogna itself was the the attempt of the German 12th Division (General Von Lequis), supported by artillery batteries and a regiment of the 13th Schützen(austro-hungarian) to capture the Pinzano Bridge  over the Tagliamento river.  They pushed hard on Nov. 1st getting to within 300 meters of the Bridge before being drove back by a counter attack launched by the Bologna Brigade who were stationed on the near by Mt. Ragogna.  The Germans consolidated their forces and renewed these attack fighting back through the village of San Petro and some sources claim getting troops on to the bridge before it was destroyed by the Italians.
And here is a link to the PDF version of my Campaign:
Battle of Ragogna Campaign pdf

The Campaign
I wrote this Campaign using Two Fat Lardies At the Sharp End Campaign rules. It is the Germans attempt to drive back to the Bridge before it is destroyed, while an Austrian player tries to hold off the Bologna Brigade on Mount Ragogna.
If enough players were available, the Austrians(which we lacked), would drive up the hill and if they lost the Italians would counter attack down the hill again thus delaying the Germans.

Our version, because it  is just Kati and I, is to just play the Germans drive towards the Pinzano Bridge.

The First battle
The first battle pitted Kati and her elite storm troopers 1st Platoon 2./OSR62 (2nd kompanie 62nd Ober Silesian Regiment) of the 12th Division against my weary Italian rifle platoon  D company 2nd Platoon 151st Regiment, of the 33rd Division, Sassari Brigade


The table was set up for Scenario 2 out of the ww1 supplement to represent clashing with the Italians outer defenses.

Somehow I forgot to take pics of the armies but here is a brief breakdown of each force and its support for the round:
German storm troopers
2 assault sections of an NCO 6 bombers and 2 rifles both with 2 trench brooms in each
2 mg support sections NCO LMG with loader and 6 rifles
flamethrower team
sniper team
off table Minenwerfer
Per game Gas attack
Italian Platoon
3 rifle squads each with NCO, 7 rifles and 2 bombers
1 VIllar Perosa SMG squad NOC, Villar Perosa SMG, loader, 5 rifles, 2 bombers
2 mmgs
off able Stokes mortar
4 sections of barbed wire

The Villar Perosa was a very unique SMG, short range, a high rate of fire and grip triggers it was originally meant for air planes.  The Italians ended up putting straps on it and firing them from the chest.

As far as the Villar in game it has a rof of 4 a 9" range and treated as a trench broom in close combat.
Here is a Link to the Italian army rules I wrote for Chain of Command:
Phil's WW1 Italy platoon


The first phase saw the Italians popping out of their trenches despite the Gas attack(which in game terms lowers the defenders command dice for the first TURN of the game) two rifle squads and a MMG.

The Germans roll 6,6,6,5,5,3 for their first phase(ending the turn and Gas attack) they use this to bring on a MG section and score 7 hits on my MMG and killing one man.


The first phase of the second turn sees the arrival of the second MG section and a Sniper team(look at those sweet jaegers) the off table mortar and Mg section shoot at my MMG but nothing sticks.


I bring on more troops and start laying down some pretty uneventful fire.


Kati starts moving her Bomber squads into the field while laying down support fire with her Mg sections.


My men start to realize things are not looking good as the storm units edge ever closer....


The first unit to break and Run is the MMG 


The bombers then begin to work on my rifle squad, beating them up with grenades. 


As sudden an end as this may seem, I look at what's about to happen and realize that I am about to take some huge casualties, and if I want my platoon to fight another day(casualties stick in the campaign) its time for a tactical withdrawal.

So the first game ends with the Italians withdrawing in good order before the Germans remind them what grenades are truly capable of.   I lost 7 men, 3 of which will never see the sun rise again, 2 that are wounded and will skip the next fight and 2 that were convinced to get back in the fray.  Kati lost only 3 guys 1 killed and 2 wounded(skipping the next battle).
The Italians withdraw to the Main defensive line just south of the village and dig in for a tough fight.


Sunday, March 13, 2016

Attack on a strong point

Attack on a Strong Point:
WW1 German training Scenario 


Today Kati and I played some WW1 Chain of Command.  Two fat Lardies have an excellent scenario Book called Stout Hearts and Iron Trooper which we took the scenario from.  The book is technically for the older Through the Mud and Blood but easily converted over using their own suggestions.  (as Chain of Command is just an "updated" version of the former.  


The book's first five scenarios come directly from training manuals of WW1 armies.  We chose to do the German manuals "attack on a strong point"  the map above is the original one in the book which do to terrain I had to tweak just a bit.  I let Kati play the Germans, She read only her briefing and the brief grenade training section, I played Italians and basically umpired the "training" course. the objective was the timely elimination to the two MMG strong points before reinforcements could arrive to counter attack.


The big difference comes in front of the concrete bunker.  The rules basically explain that an route directly to the bunker is blocked so instead of putting a bunch of filled in trenches in front I just used barbed wire. 


The German player aka Kati received a relatively small platoon  with 
1 Lt.
2- 8 man bomber sections
1- 6 man LMG section
2 snipers 
I find the use of the snipers to be interesting. The book explains they are key to keeping MMGs down.


The Italians (really this could be any army, although technically it was the french in the book) have 
2 five man MMG sections with a junior leader.  Both armies had a force moral of 9 and rated as regulars.


Deployment was very simple one MMG section was in the Bunker and the other was in a larger crater to the left of it, and there was a blocked trench in front of it. The German jump off points were located where the trench lines enter on the southern edge of the map.


Turn 1
Phase 1 of turn one saw the Germans role 1,1,1,3,5 on the command dice.


Kati deployed both of her snipers in craters on her side of the table to prep for covering fire.


Her LMG section then entered and started throwing lead at the bunker. The Italians inside mostly had been staring blankly out the window as this opening volley killed one of their men and wounded the Junior Leader inside.  This would limit the bunker for the whole game. On the plus side for the Italians, the stolen Lewis gun Jerry was using jammed up. This wrapped up her phase.

My command rule was a 5,4,2,1 Being so limited in units not a lot I could do.


My MMG in the Crater opened up on the LMG killing one and putting 2 shock on them.


End of the first phase leaves the Italians already worried.

Phase 2
The Germans roll 6,5,3,2,1


First order of business was to bring on a bomber section behind the LMG.  Which was followed by the LMG unjamming and unloading on the bunker with no effect.


This was followed by a sniper freaking out the Crater MMG and putting 2 shock on the section (ignore the third shock in pic).

I followed this up with a command roll of 1,1,3,4
I combined the two 1s into a 2 
The Bunker opened up the the newly arrived bomber section with no affect  while the Crater MMG removes a shock and goes into overwatch to try to spot a sniper.


 Phase three sees the German LMG remove some shock and move up, while at the other entry point a second bomber squad enters.


And another sniper shot on the MMG.

I then rolled a 5,4,4,1 on my command roll and proceeded to do nothing.  Let's assume that ammo was being brought forward.

Kati quickly makes up for my command roll with a 6,6,4,3,2
Giving her the next two phases.


Her LT. enters behind the LMG section while the Bombers move up.  The LMG opens up on the crater putting another shock on the section.


With her second phase, she moves the bombers up and into the crater near the bunker.


On the other side ot the table her second bomber squad makes its intentions known by moving up into the gun pit. The LMG flounders an attack roll and jams up.


My MMGs finally start dishing out some fire.  The Crater scores a kill and a shock on the LMG section and the Bunker hits the approaching bomber section and puts 3 shock on it.

Kati's phase 5 she rolls three 6s thus ending the turn.


The Dice gods were not with me today.  After ending the turn, Kati rolled 6s TWICE more giving her 3 phases in a row.  She used this to move her bombers, flanking my right up and the other bomber squad began to chuck grenades into the bunker while a sniper hits the leader of the crater MMG.....doom was approaching.

Turn 2


Pinned down and leaderless, the Crater attempts to fire one last burst at the bombers. It kills two but the hail of grenades that followed (18 dice treated as in the open) broke the section.


In the bunker things were falling apart as well: leader down, gun jammed and pinned down


A final grenade put the section out of action so Kati used her command point she had built up to end the turn which made both MMGs leave the table, thus ending the game.


The final Shot.

Overall Kati did pretty much what she needed to do to ensure a swift victory.  

After the game I showed her the official tactical solution.

Overall I think it went well and was fun for both of us.  If I played it again I would give the side defending a Senior officer just to help with dice useage.