Tuesday, December 20, 2016

The Men Who Would be Kings: Rules Intro and Solo Play

The Men Who Would be Kings: Rules Intro and Solo Play


I finally picked up a copy of the new colonial wargaming rules from Osprey "The Men Who Would Be Kings." I have heard a lot of good things about them thus I figured I would give them a try.  For colonial the only rule sets I have is Black Powder and Sharps Practice(which I hear is getting a supplement for the period).  At first glance TMWWBK is a mix of both of these games and at the same time very much its own game,

Now what I normally do is read through the rules then bust out a few minis and play around with the mechanics  before I try to play a game with Kati.  Nothing bores her more than me saying "hold on I'm not sure if you can do that. Let me look at the rules" 50 times(15 to 20 is the limit).
But! luckily for me this game comes with a built in solo mode. This is a pretty rare find these days and while not everyone's thing it's a nice thing to have on a lonely night.  Normally I don't bore people with my solo testing but since its "in the rules" I say it's justified and it gives me a chance to dive more into the rules as a kind of review.  I do not plan to cover every rule in the book I like to use the "fence post method" where I cover a few things in detail and skim the stuff in between.


I went ahead and played a generic 24 point(it has a point system) British list which I will list below but first I'll talk about the leaders.  Each unit has a leader with a leadership value.  this value is a number between 5-10(from what i've seen)  this value is what you need to roll above to get said leaders unit to do an order.  So if the leader has a leadership value of 7+ you must roll a 7 or  higher on two d6 to perform the action.   Interestingly you roll for the leadership value of every leader after you make your army and its semi random.  Based on the troop type you roll a d6 and get assigned a value then you roll a couple of dice and get assigned a leader trait.  These traits can be anything from a coward to lucky and give you either a positive or negative affect.  A coward for example must always move to stay beyond enemy move distance.

The force I had was as followed
3 groups of regulars with a leadership value of 5+, 6+ and 7+
1 group of Irregular cavalry NNH 5+
1 group of Tribal infantry that are unenthusiastic(-1 discipline)   NNC 9+ (lead by a dunce)

While I didn't add any you can had traits to you units for extra points like sharpshooters or fierce fighters to give your units bonuses.


For the basic game on your turn you give each of your units one of ten different actions which are:
At the Double
Attack(melee)
Fire
Form close Order(regulars only)
Go to Ground(Tribal infantry only)
Move
Rally
Skirmish(move have speed in shoot with half dice)
Stand to
Volley Fire(unit in close order only)

A few comments here.  I like and dislike the simplicity to the system.  I like it because you get a lot of options but do not feel like its overwhelming.  It is obviously meant to trade some(not all) realism for speed of play, which is fine if done right.
 I like the inclusion of the go to ground rule, in all the first hand accounts I have read about the zulu war this was a common occurrence when the Zulu warriors were met with a harsh fire.
The rule that feels strange is Skirmish all it does is make you move at half your units speed and fire with half dice...that's it and you must do it each turn its an order not a stance.
To do any of these actions a role a leadership check trying to get equal to or higher than the leadership value of the units leader.  A units discipline can effect this roll.
Each unit only does one thing each turn move or fire or rally etc this is fine just feels weird to me after playing other games.
An interesting feature is that each unit type has one order that they can do for free(do not have to make an order test for)  Regulars fire for free, Tribal units move for free etc.  I like this as it adds some flare to each unit    

all unit have a stat line that includes both fire value, melee, movement etc.  each type also has certain things it can do that others can not such as Tribals getting to move through terrain at no cost to movement.

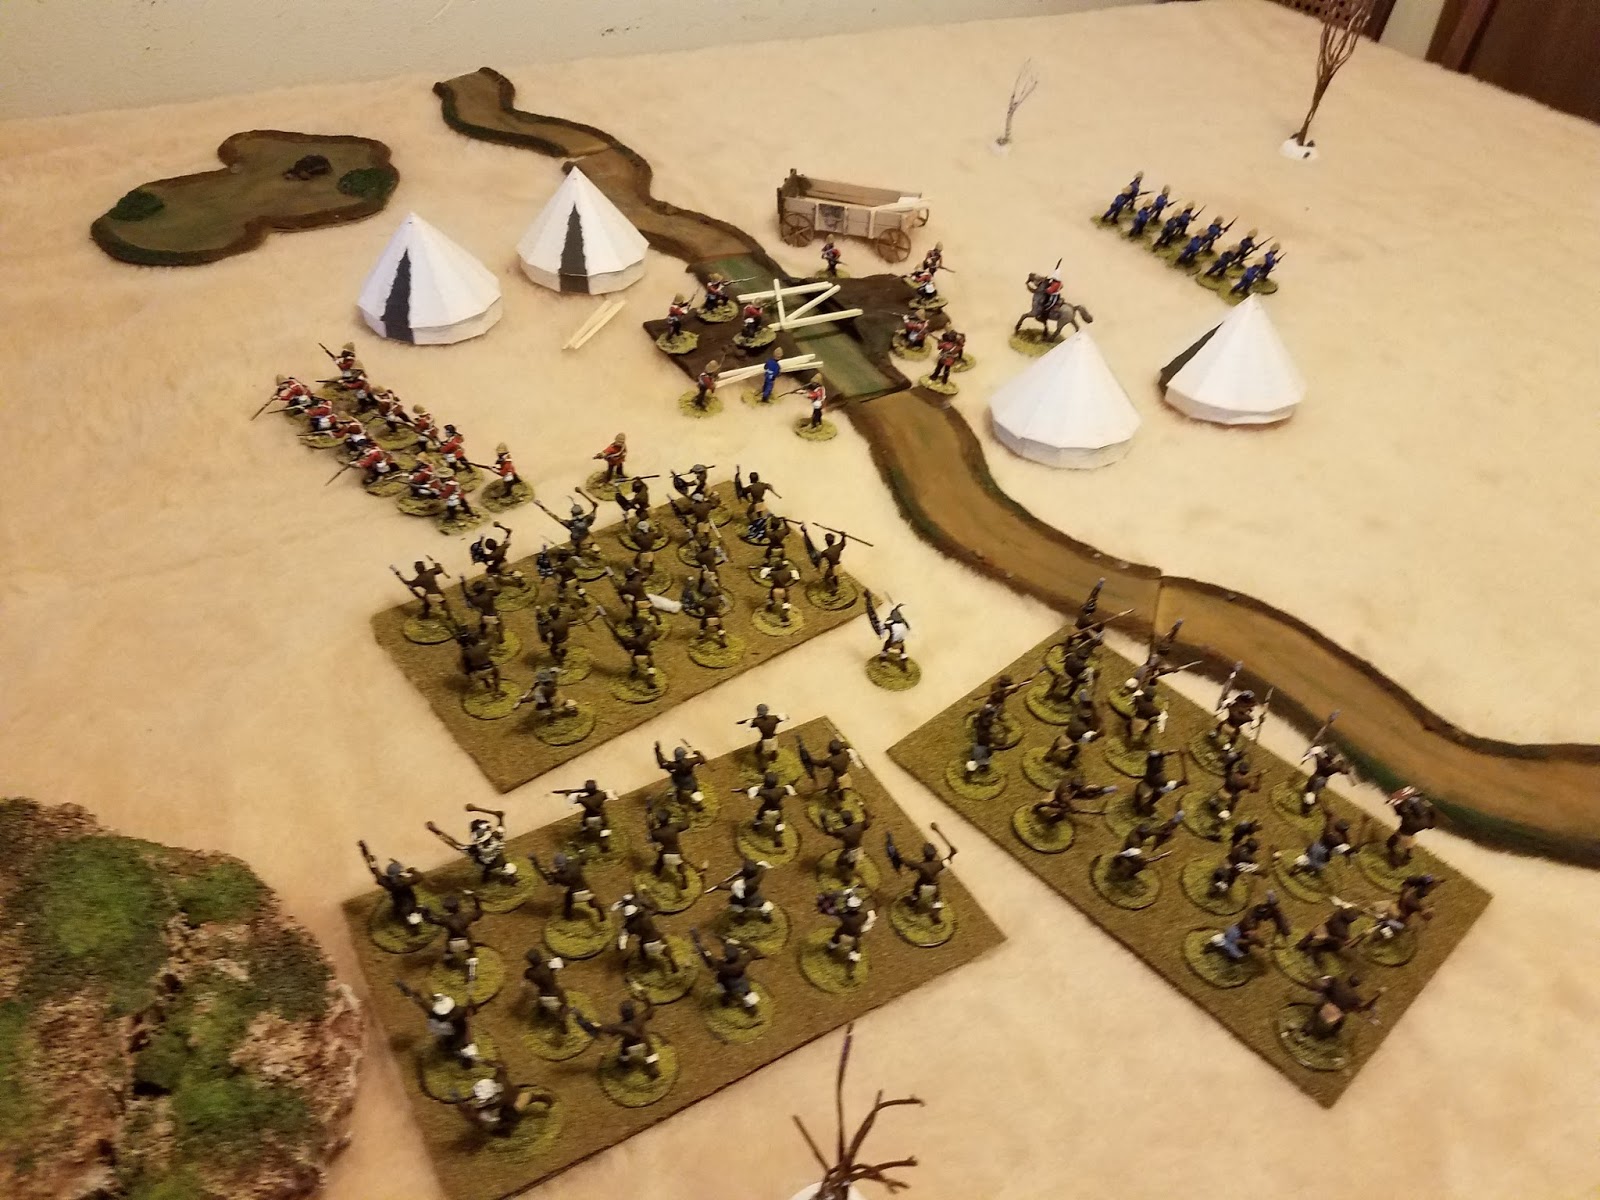
Now on to the start of the game.


As far as the solo rules go they work very well.  They are very simple and basically as you move enemy units can appear on the battle field based on a roll on a couple of charts.   On the non player turn you again roll on a chart to see what each unit does.  not these charts are overruled and supported but a list of rules that explain that if X happens then do Y.   I enjoyed it it was not hard to figure out and it didn't feel to off.

So as I moved my first group of regulars up and some Zulu appeared right in front of them. Other than the adjacent unit moving up to join them all my other units failed their order test.


The Zulu units each had an action(the non player units always pass order test except to rally) the first unit went to ground.


The second unit advance on my line


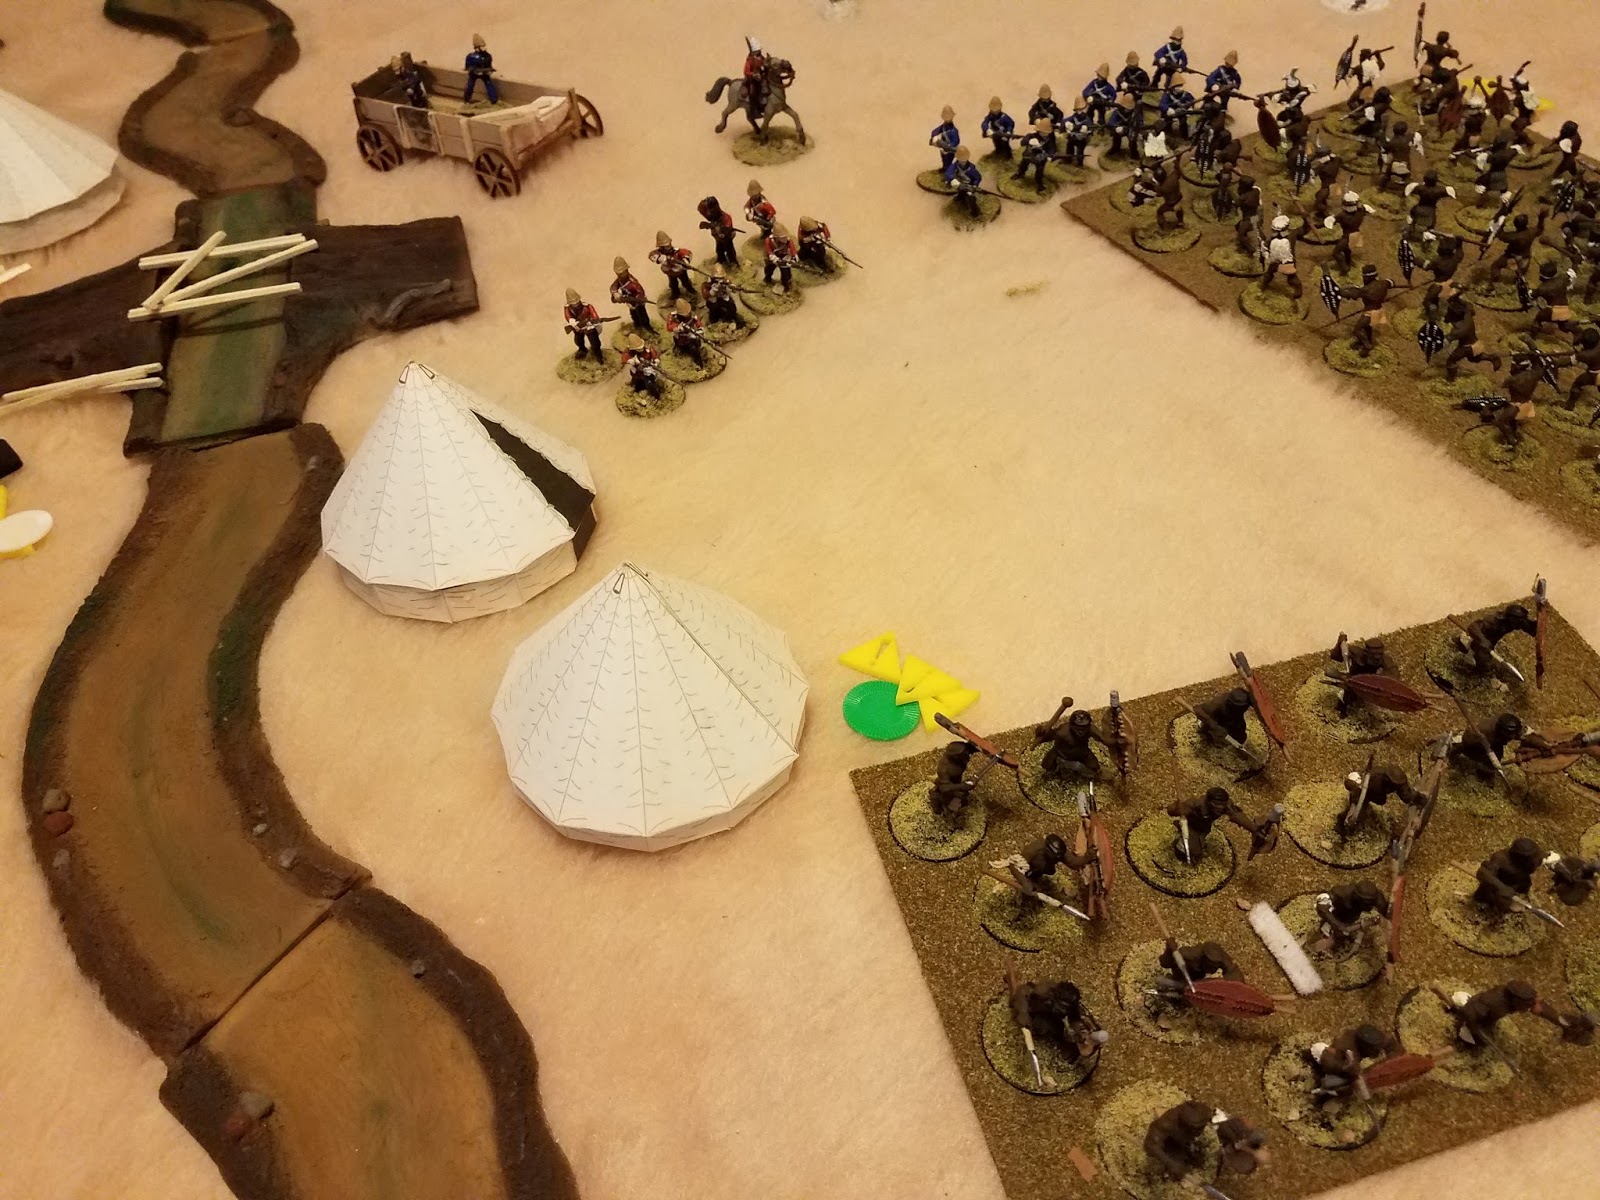
The unit was then given some sharp fire by my men.
Firing is very simple: if your unit has a fire value of 5+ then you roll dice equal to the models in the unit and any that are 5 or higher hit.  At short range every hit is a kill and at long range every 2 hits is a kill.  Terrain can also effect the results in the same manner.
Every time a unit suffers a hit it must roll a leader value test or get a pinned marker.  the test is modified by the number of casualties taken from the hit so the more men you lose in a volley the more like you will get a pinned maker.  A unit accumulates pinned markers the more its hit.  Once pinned a unit has to attempt to rally(which causes them to shake the markers, retreat a half move or rout)


My last set of regulars which are a naval company used the skirmish order to move 3" and fire with 6 dices...,mostly just to use the rules.  My NNC did nothing again because they have a leader value of 9+ and a discipline of -1 so i need a 10 or higher or do anything. 


The NNH moved up and spotted another group of Zulu on the right flank.


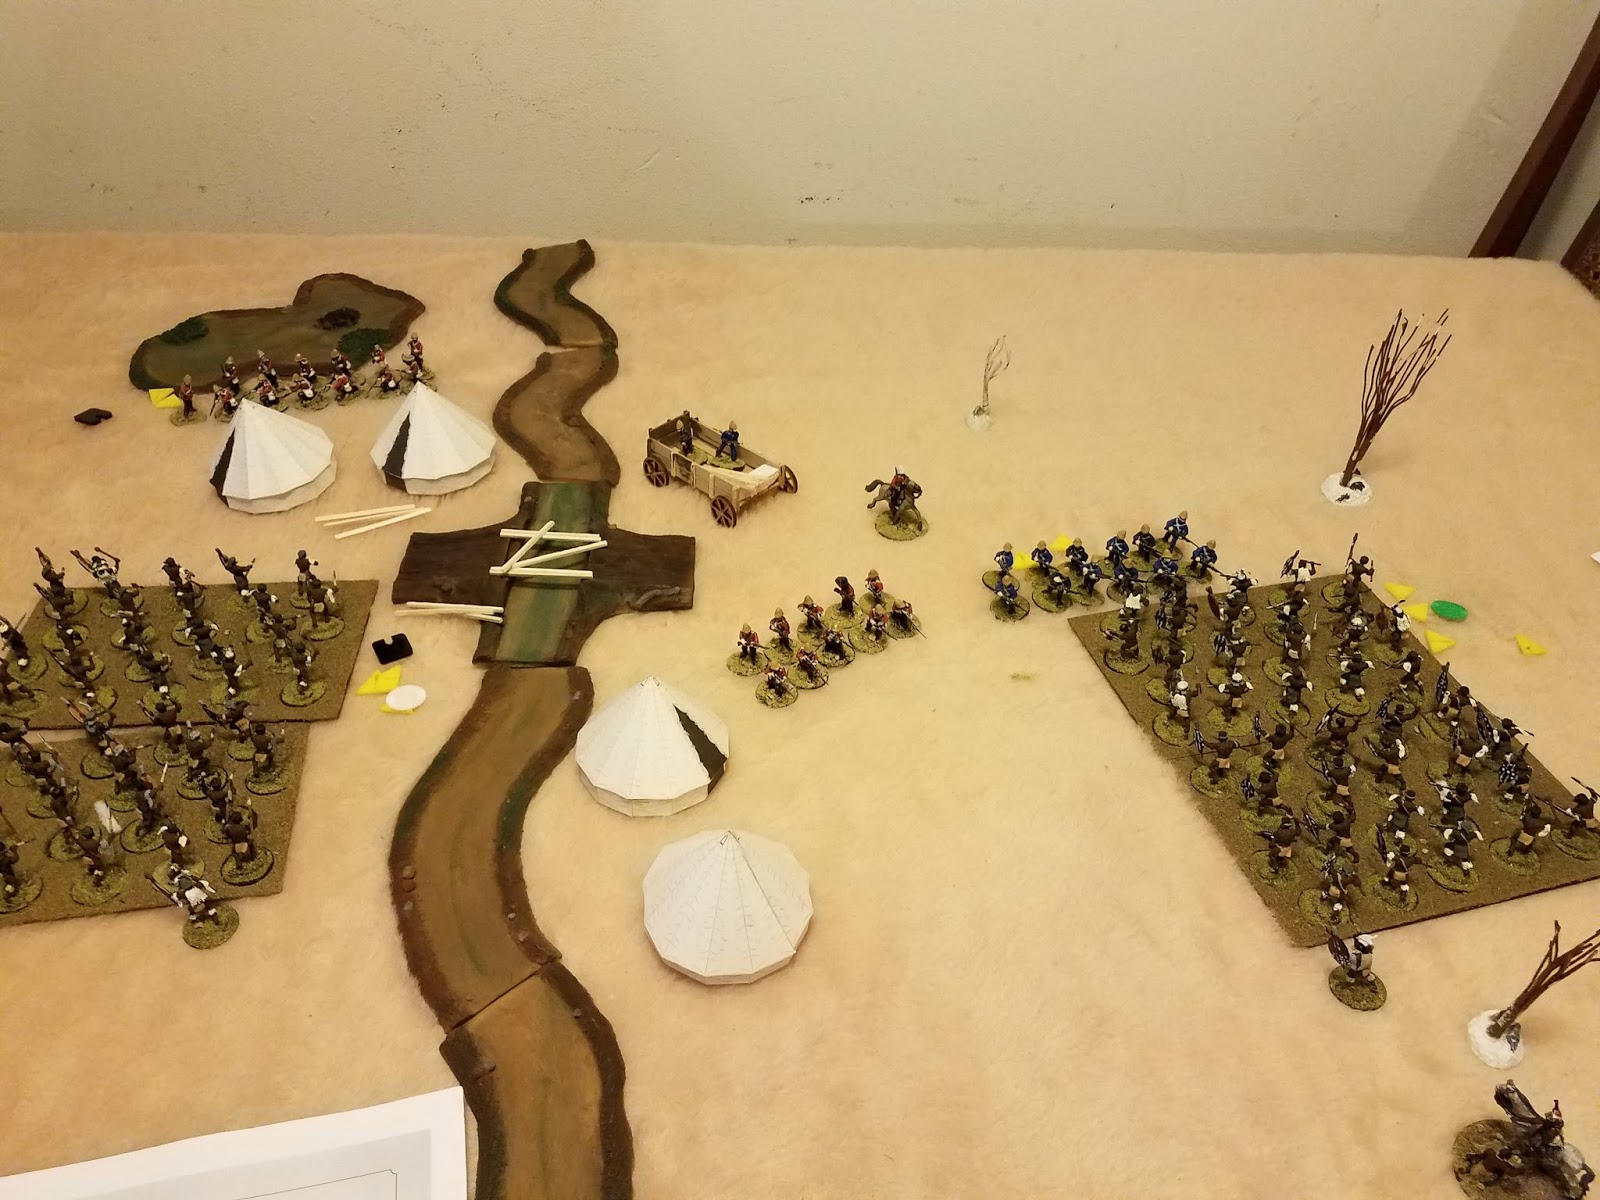
On the Zulu turn the first unit failed its rally test and retreated.

The second unit advanced while the third broke and ran(solo rules only) and the last unit went to ground.


the poor saps that advanced then felt several volleys from my men.


The NNC finally moved at the double and just to do it ran over the hill.


At the Start of the Zulu turn the 4th unit pulled of a charge at the double and slammed into my NNH.  Melee works just like firing only both units roll at the same time.


They scored 10 hits


My boys really dropped the ball scoring only three.  

Lucky for them it takes 2 hits to take done a horsemen so ten hits equals 5 deaths.  They stilled ended up pinned and retreating.


That is where I ended the game as it was getting late and I felt like I had seen a good portion of the rules.  

Overall I enjoyed the game, everything I felt weird about was mostly just because it was different than other rules.  I think this ruleset is going to make for  great "pick up games"  It's small, fast and very scenario driven.  The leader traits add another level of variation as well.  The order system reminds me of BP but the  leaders having traits is closer to SP.  The scale and model removal is also more akin to SP.

As for the solo rules I think they work fine.  You are not going to end up with a super tactical opponent  its more of a "can you survive the hoards attacking you" style.  This style could also be a fun thing to do with another player both playing one side and seeing who holds off the longest.

A final thought on the rules I wonder how the game would play if instead of me moving my whole force then you doing the same each player took turns activating one of their units back and forth.  I think skirmish games feel more real when its less units going at a time.  If one side had more units than the other the side with less could get a couple of passes to fill in the gaps.  I don't know what it would do its just a thought 


Disclaimer: As I am posting this solo the grammar is a little less elegant and more me talking at you as Kati likes to be the editor(I'd be lost without her) 


Sunday, December 11, 2016

Zulu War Bridge Ambush

Ambush at the bridge: Zululand 1879


Kati and I decided to take a break from ww2 and break out the Zulu war figures. We used Warlord Games Black Powder rules which is a rule set we both love and hate.  We love that its fast and very convention friendly, people can learn the rules in 10 minutes. We also enjoy to command system even if it can make you want to throw your dice across the room sometimes.  I personally also love that it scales very well and you can use it for any size army and basing.  We dislike the base movement distance (which can be changed) the support aspect in hand to hand  and the disorder rule.  Luckily we have been building up some forces behind the scenes to play Hail Caesar and while at its core it is based off Black Powder it looks like that changed a lot of what we dislike, but anyway on to the game!


The scenario we used (what I am about to say might be heresy to some gamers) is a black powder adaptation of an old The Sword and the Flame scenario that was free on boardgamegeeks.  The idea is simple; some Brits are building a bridge and a Zulu force ambushes them.  The object of the British was to repel the attack and the Zulu were out to wipe out the work detail.


The British are set up as follows: a company of naval infantry standing guard on the east side of the bridge and a company of regulars guarded the west bank. A third company was the poor saps that were actually stuck building the bridge. This third company would have to make a command check to organize into line once the enemy was spotted.  We had 2 officers on site each with a command rating of 8.


The Zulu were organized into two brigades of 3 units each with a overall commander, and all commands were rated 8.  The Zulu were allowed to enter the table on either the north side or south side with the ability to deploy on either side of the river.


Kati's Zulu had first turn and one of her brigades got within literal inches of my force right off the bat.  Luckily for me the other brigade didn't get the memo and wasted a turn off table.


The boys working on the bridge quickly grabbed their guns and formed up safely on the other side of the river while my regulars wheeled to meet the oncoming assault.  The sailors must have been in shock as they failed their command roll and stood in place.  


The first volley was spot on. I got 4 hits and a disorder marker, and the Zulu failed all but one save.  


Turn 2 saw the rest of the Zulu enter on the east side of the river and again stopped just short of the target.


Back on the west bank, the other two warbands leaped past the shaken unit and smashed into my company.  I was thankful for the Brits stubborn and steady rules as I failed to do much to the Zulu and was making a break test first round (which I auto-passed because of stubborn).


A couple of mediocre volleys are attempted that do nothing to stop what's coming.


The next turn sees everyone locked in melee with no one breaking.


My regulars finally fall back under the pressure.


Kati then has a unit break as well.


At this point it was still anyone's game


The Zulu renew their attacks on both fronts.


The first British unit to break is the bridge builders. 


The Naval troops break another Zulu unit and the Zulus that beat the bridge builders attacked them.


On the West bank the regulars repulsed another warband just to be flanked by the other.


They finally broke and run under the pressure.


The game ended with the withdrawal of the Naval troops. The Zulu were able to pull off a very costly ambush.  Overall a pleasant, quick and simple game.  If we played it again we would add more units to the table as it was almost too fast (we were done in an hour and a half).


Saturday, December 10, 2016

Old Hickory part 3

Old Hickory Part 3


Kati and I finally found time to get in our third game of the old hickory campaign today and it was interesting...just not in an exciting way.  I'll follow our traditional format for this post but it will be a pretty brief entry.


As per the last two turns I(the americans) divided up my forces between the 3 routes Kati and her Germans can attack.  But unlike the last game where she attacked where I didn't expect it, this time I was ready.


The German attack was on area 2 of red ladder.


The map which we took directly from the campaign guide was interesting.  As we put it together we both noted how open it was and how that was similar to our last game.  One must wonder (as these maps are based off real maps from the fight) if this openness was part of the reason the Germans had such a hard time taking this area.


I was pretty happy with my forces guarding this area.  I had platoon two and its two fresh squads plus 2 of the 3" AT guns a .30 cal mmg, 2 Lt.s, a mortar observer, and a medical orderly.  


Opposing me was Kati's fresh full strength 3rd platoon  supported by a Pz IV and a forward observer.  These German Panzergrenadier platoons with the 2 mg42 teams can really lay down the fire.


The patrol phase did not have a lot of surprises in it.  Kati ended up with one jump off point south of the road and 2 in the hedges to the north.  And I got one jump off point behind each of the hedge sections on my side of the table.

The scenario only required you to force your opponent of the table via force moral and hold one's' own morale above 3,  Kati had learned several lessons last game and she put that knowledge to good use.


Early game saw us both taking advantage of the hedges on either side of the field


I quickly deployed my 3" AT guns and .30 cal and started to throw HE rounds into the Germans in the hedgerows.


Kati filled the hedges with MGs in the north and used her southern jump off point to try and move up a flanking force.


A few good(and lucky) busts left one of my guns pinned and basically out of the game right off the bat. 


Her mortars ranging shot(green token) was  right on and before I could move the .30 cal completely free of the area a barrage came down on them and the 3" AT gun.  Luckily I had a CoC point and quickly ended the turn before I lost too many men.


And then my men moved right back up. Thanks to my Lt. moving over to make it happen.


The Pz IV entered the table and started hammering my forward obsever who was where my AT gun had been knocked out.


I had one good shot with my AT gun at the tank before he could respond and it dinged off the armor.(the tank is waaaay down the road).


Then my gun was knocked out.


Kati's southern squad attacked and started to pound my troops from yet another angle.


I moved my 2nd squad up to the hedge and a ranging shot quickly fell in their midst.


and I couldn't get away.


My first platoon(pictured bottom center) was reduced to 3 men and Kati's troops were moving up the road when I ordered the retreat. Another sound victory for the Germans.  German losses were 5 men and American losses were 10 men and the 2 AT guns.  Not a good day for the red white and blue, this means the road into the town is open and the next fight will be for the town itself.

Kati played well, she targeted my AT guns early and hunkered down with her MG42s for a long range fire fight knowing her squads have a lot more firepower than mine in a straight fight. For me this was a rough game and I wonder if a more aggressive approach was in order.  I was hoping to repeat turn 2 by playing a defensive game and it cost me.

Next time we take the fight into the village and I hope it isn't the final round of the campaign(because that would mean the Americans couldn't hold).